Introduction
WordPress is a popular content management system that powers over 40% of all websites on the internet. Whether you are building a simple blog or a complex e-commerce site, WordPress provides a user-friendly and customizable platform to build your website. However, maintaining and updating a live WordPress website can be challenging, especially if you are testing new themes or plugins, or making major changes to your site’s functionality.
This is where a staging website can come in handy. A staging website is essentially a duplicate of your live website that allows you to test changes before making them live. In this article, we will explain the benefits of creating a staging website for WordPress, and provide step-by-step instructions on how to clone a WordPress installation using the cPanel ‘WordPress Toolkit’.
Benefits of a Staging Website
Test Changes Safely
The primary benefit of a staging website is that it allows you to test changes safely. Rather than making changes on your live website and potentially breaking it, you can make changes on your staging site and ensure that everything is working as expected before deploying those changes to your live site. This is especially useful for testing major changes to your site’s functionality, such as adding new plugins or updating your theme.
Avoid Downtime
Creating a staging website can help you avoid downtime on your live website. If you need to make significant changes to your site, you may need to take it offline temporarily. This can be disruptive to your visitors and can negatively impact your search engine rankings. However, if you have a staging website, you can make changes without affecting your live site, so your visitors can continue to access your content without interruption.
Improved Site Performance
A staging website can also improve your site’s performance. By testing changes on your staging site, you can identify any performance issues before deploying those changes to your live site. This can help you optimize your site’s speed and performance, which can improve your site’s user experience and search engine rankings.
Improved Collaboration
A staging website can also facilitate collaboration among team members. By having a separate staging site, you can give each team member their own environment to work in. This can help prevent conflicts when multiple people are working on the same site simultaneously. Additionally, you can use your staging website to get feedback from other team members and stakeholders before deploying changes to your live site.
How to Clone a WordPress Installation using the cPanel ‘WordPress Toolkit’
Now that we’ve covered the benefits of a staging website let’s walk through the process of cloning a WordPress installation using the cPanel ‘WordPress Toolkit’. This process may vary slightly depending on your web host, but the general steps should be similar.
Step 1: Log in to cPanel
Log in to your cPanel account and navigate to the ‘WordPress Toolkit’ section…

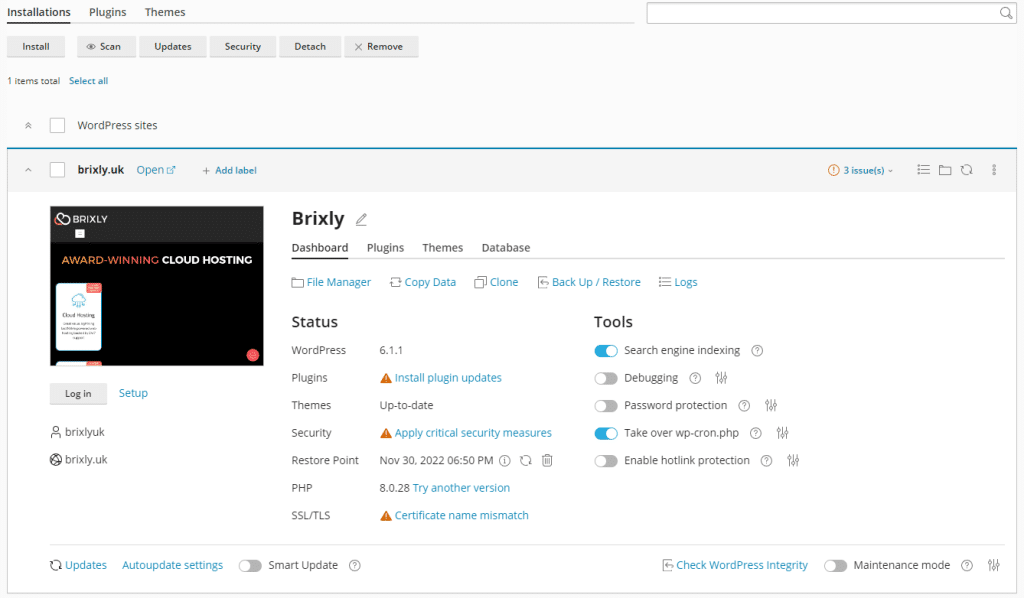
The WordPress Toolkit interface will show you something similar to the following, but with the WordPress installations within your own account…


Step 2: Create a Staging Site
To create a staging domain, you will need to ‘Clone’ the main installation, ideally, to a new subdomain.
Click on the ‘Clone’ button to create a new staging site…

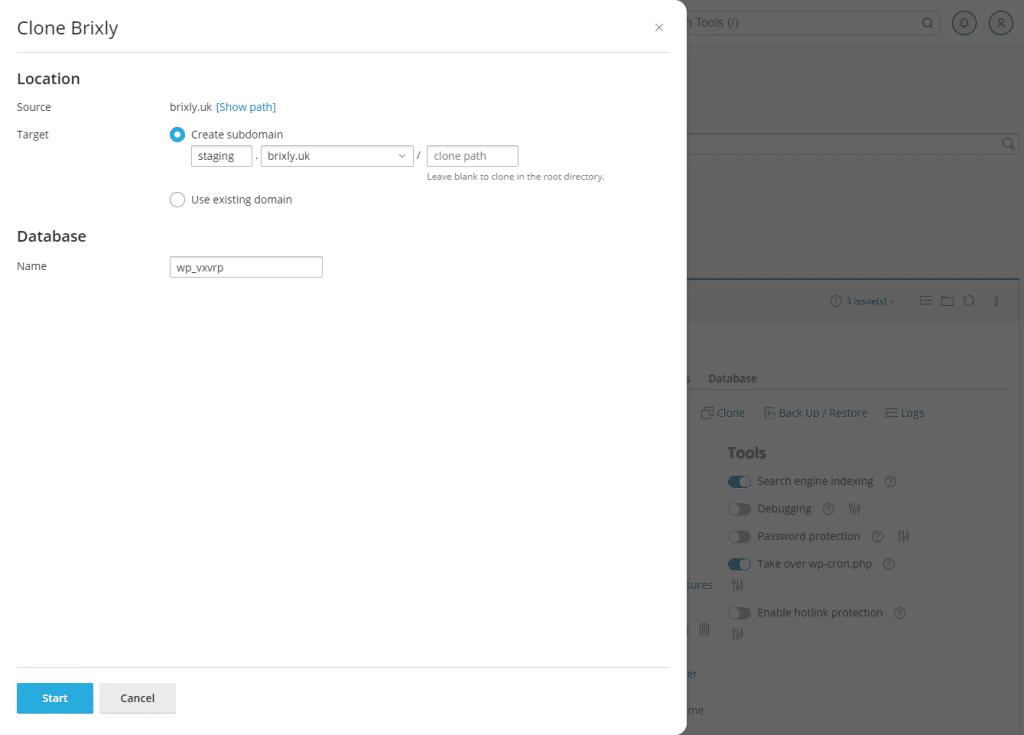
Step 3: Choose the location of your new Staging domain

Step 4: Choose Staging Site Options
Choose the options for your staging site, including the subdomain, and the database name, and click ‘Start’ to begin the clone process.
Step 5: Clone your Site
Once you have configured your options, click on the ‘Create’ button to clone your site. This process may take a few minutes, depending on the size of your site.
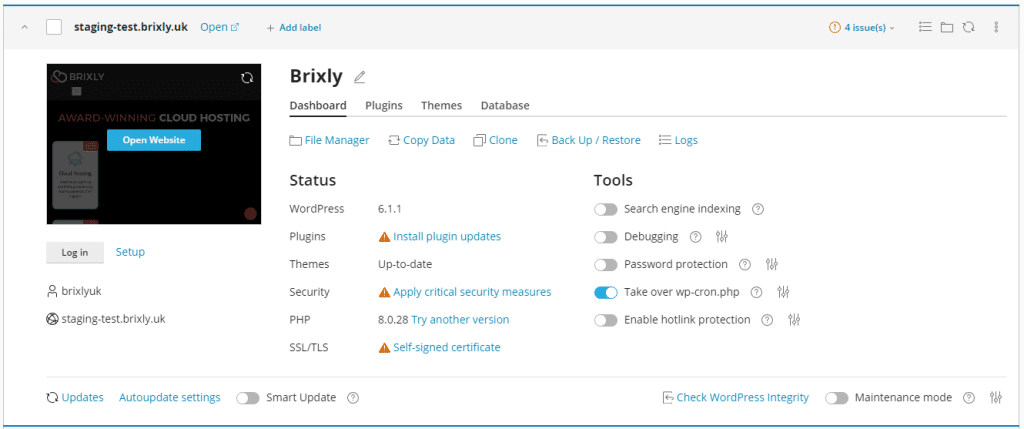
You will be able to monitor its progress in the window, as follows…

Step 6: Test Your Staging Site
Once the cloning process is complete, you can access your staging site by navigating to the URL you specified in step 4. Test your site to ensure that everything is working as expected.

Step 7: Make Changes on Your Staging
Now that you have created your staging website, you can make changes to it without affecting your live website. Here are a few things you might want to do on your staging site:
- Test new themes or plugins: You can install new themes or plugins on your staging site to test their compatibility with your existing site. This can help you identify any issues before deploying those changes to your live site.
- Make design changes: You can use your staging site to experiment with new designs or layouts for your site. This can help you see how different design elements work together before making them live.
- Test site functionality: If you are planning to add new features or functionality to your site, you can test them on your staging site to ensure that they work as expected.
Step 8: Deploy Changes to Your Live Site
Once you have tested your changes on your staging site and are happy with the results, you can deploy those changes to your live site.
To do this, simply clone your WordPress Staging site, to overwrite the main domain!
Conclusion
Creating a staging website for your WordPress site is a valuable tool for testing changes and improvements before deploying them to your live site. It can help you avoid downtime, improve site performance, and facilitate collaboration among team members. With cPanel’s ‘WordPress Toolkit’, cloning your site and creating a staging website is a simple process. By following the steps outlined in this article, you can create a staging site and test changes to your site safely and efficiently.


