Beginners Guide to cPanel
This is a beginners guide showing you how to use cPanel and how some of the feature’s work.

What is cPanel?
cPanel is the most popular Linux-based control panel that is used to manage web servers using a user-friendly interface. With cPanel you can manage every aspect of your web hosting business.
How to Access my cPanel
There are several ways to access your cPanel. With Brixly you can access it directly from our client area. Below we will show you various other ways to do it.
Solution 1
You can access your cPanel account by simply typing in your domain and adding cPanel at the end. For example, https://yourdomain.com/cpanel in some instances it will be https://yourdomain.com/2083.

Depending on your web hosting provider cPanel can be accessed using the ports 2082 or 2083. You should get your link information via email immediately after signing up.

Solution 2
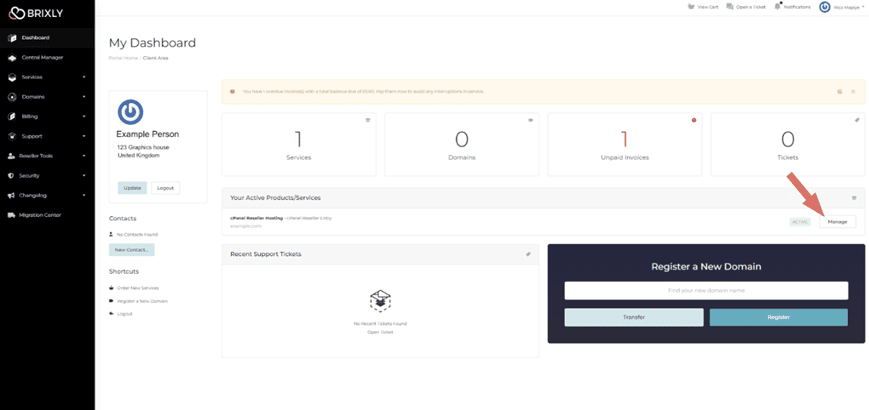
From your client area you can access cPanel by going to the ‘Products/Services’ section. You would then navigation to the service you want to access. Click on the ‘Manage’ button
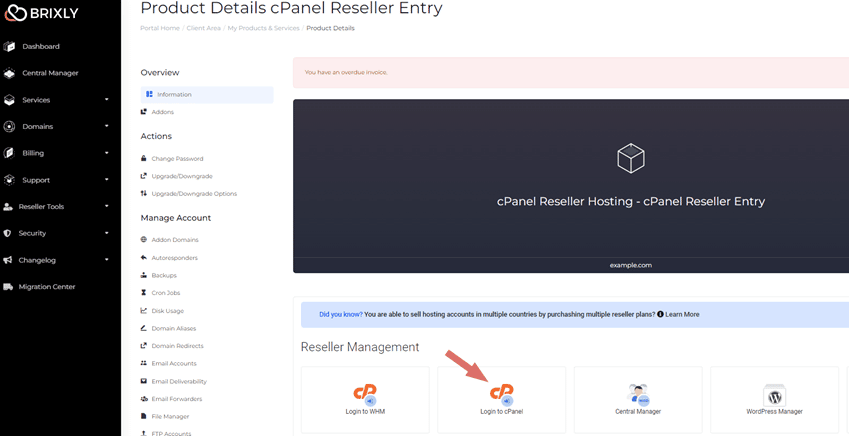
After clicking on ‘Manage’ you’ll be in the product page. Under the ‘Reseller Management’ click on the ‘Login to cPanel’ button.
Solution 3
As root or a reseller from WHM. If you’re already logged into the Web Host Manager interface, you can click on the orange “cP” icon next to the account username on the Account Information > List Accounts feature page.

The cPanel Dashboard
This is how the cPanel dashboard interface looks like.
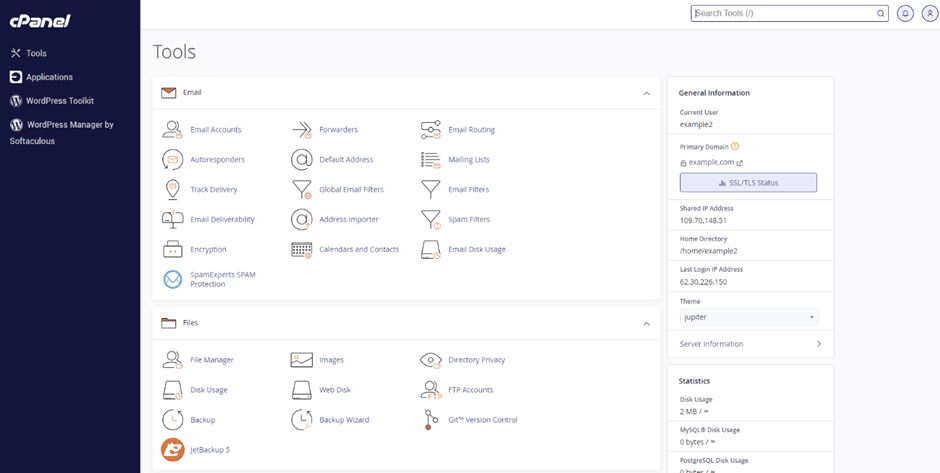
Navigation Bar
The navigation bar is found at the top right corner of the page. It contains a search field, a notification tab, and an account section user menu.

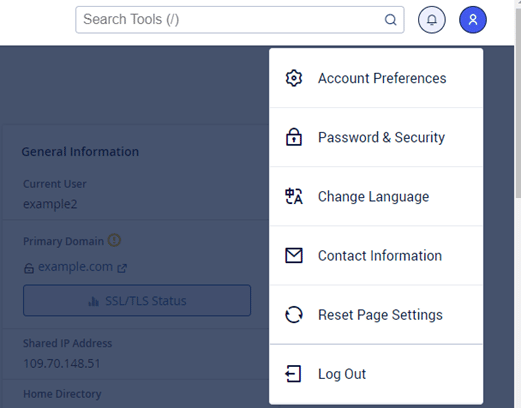
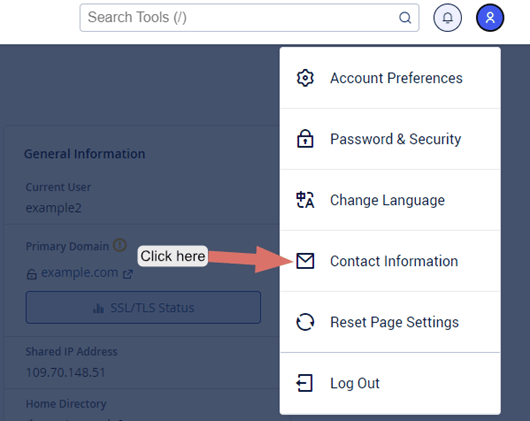
After clicking on the user menu, you can access your account preferences, change your language, password, contact information and the logout option.
How to update contact information.
To change your account information, you would need to go to the navigation bar, click on the ‘User menu’ and then click on ‘Contact Information’.
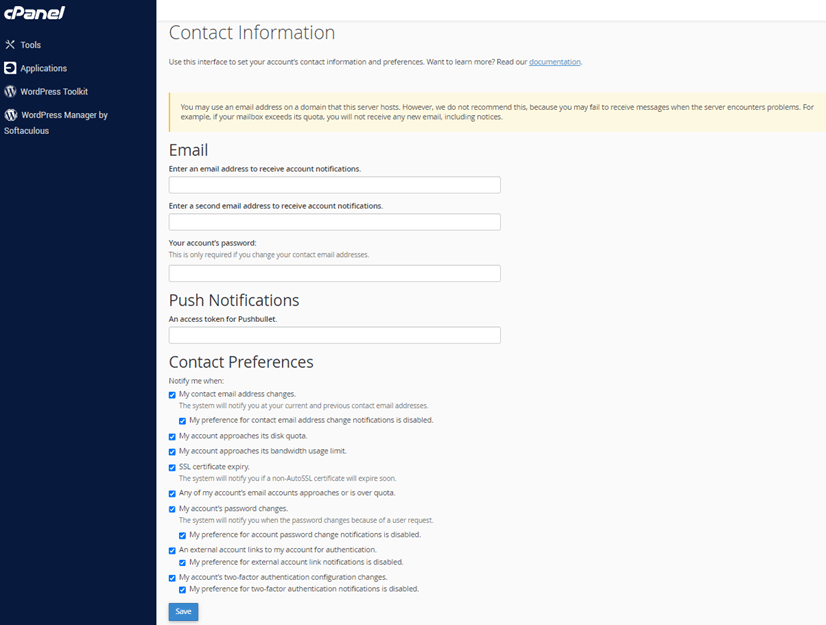
In the ‘Contact Information’ page, enter the details you want to update and then click ‘Save’.
We recommend having all boxes under ‘Contact Preferences’ ticked, as they’re all updates that could alert you to potential breaches, suspicious activities, or hosting issues.
How to change your Password
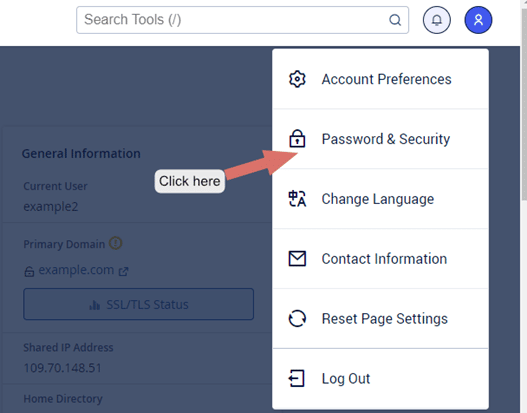
To change your password, you would have to go to the ‘user menu’ on the navigation bar, click on ‘Password & Security’.
In the ‘Password & Security’ section, to change your password you would need to verify and enter your current password. You can then go on to enter your new password.
Please note there’s a different procedure to follow if you have forgotten your password.
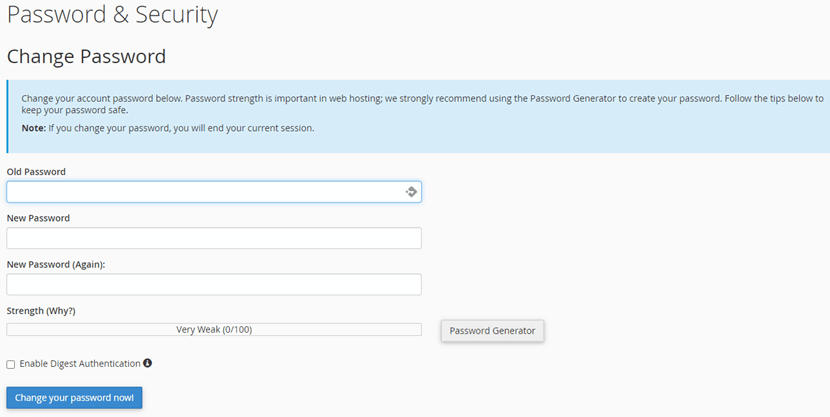
We recommend that you use the ‘Generate Password’ to get the strongest password for security purposes.
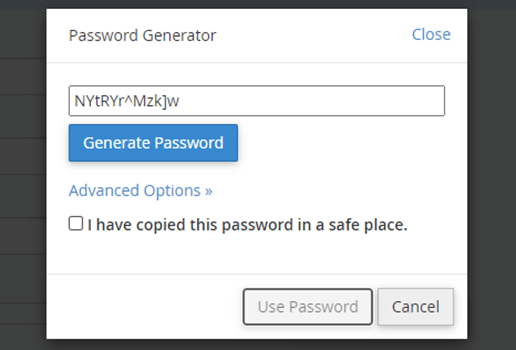
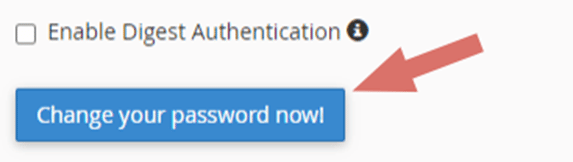
After the password has been set, you can now click on ‘Change your password now!’
Navigation Search Bar
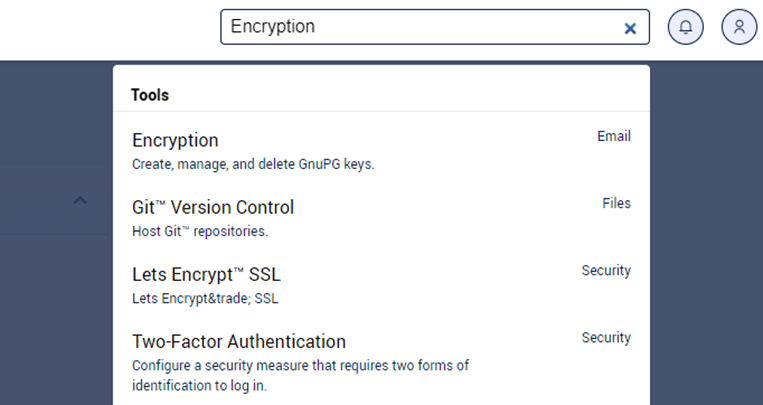
The search bar is the easiest way to locate something on cPanel. Simply just type in what you’re looking for and the search bar will do the rest.
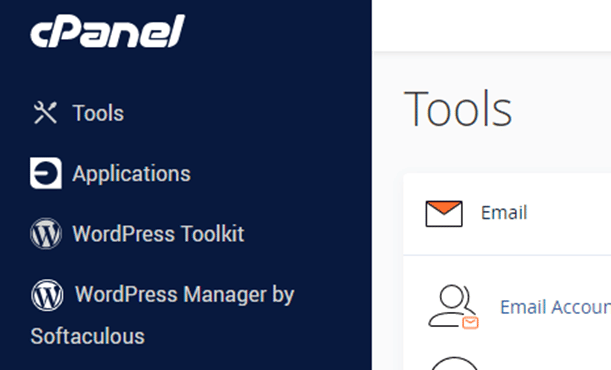
Sidebar
The sidebar section is simple, the ‘Tools’ tab is basically the dashboard link. The ‘Applications’ is a link to installatron which is a comprehensive server application that enables users to install over 50 scripts with most applications available in more than 30 languages. The ‘WordPress Toolkit’ is a feature-rich, all-in-one management solution for WordPress Installations. The Toolkit allows users to install, configure and manage WordPress websites. Last but not least, ‘WordPress Manager by Softaculous’ is the link to Softaculous. Currently, Softaculous is the leading web hosting auto installer, with more than 370 scripts ready to be installed.
Check out our article on how to install WordPress using cPanel.
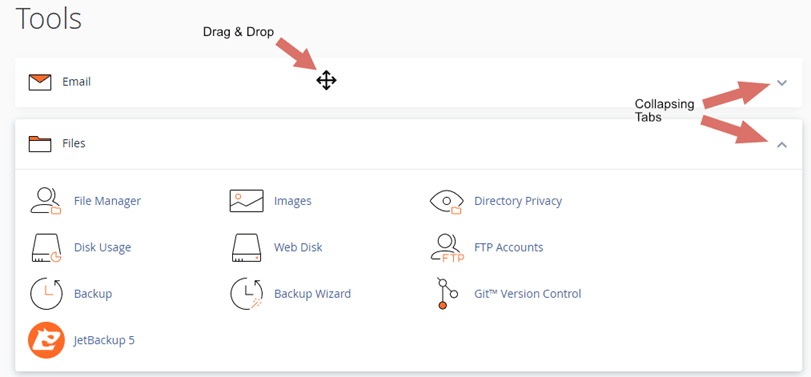
Organising Dashboard
You can organise your dashboard by using the collapsing tabs at the end of each section. The interface allows you to use your mouse cursor to drag and reorder your tabs.
Why does my dashboard look different?
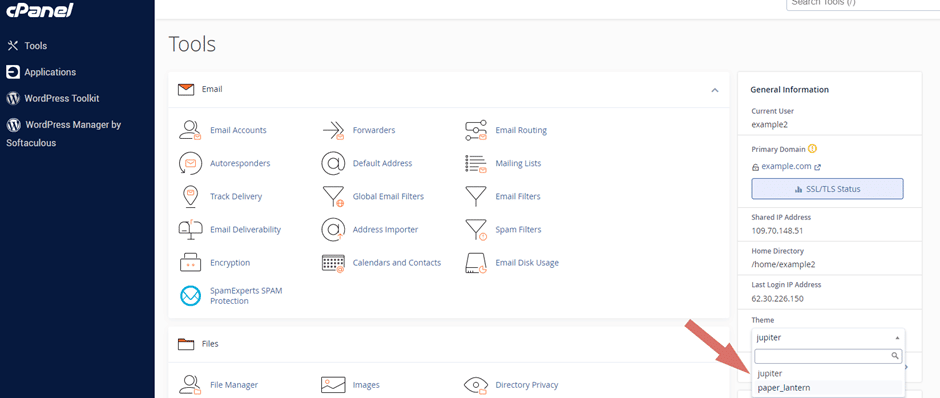
Changing cPanel Themes
At Brixly we recommend that all our clients use the ‘Jupiter’ theme. However, if you want to use the old theme ‘Paper_Lantern’ you can change it by clicking on the dropdown menu in the ‘Theme’ section. It was officially announced by cPanel about ‘Paper-Lanterns’ deprecation and its eventual removal from the interface. Switching to ‘Paper-lantern’ should be a short-term solution.
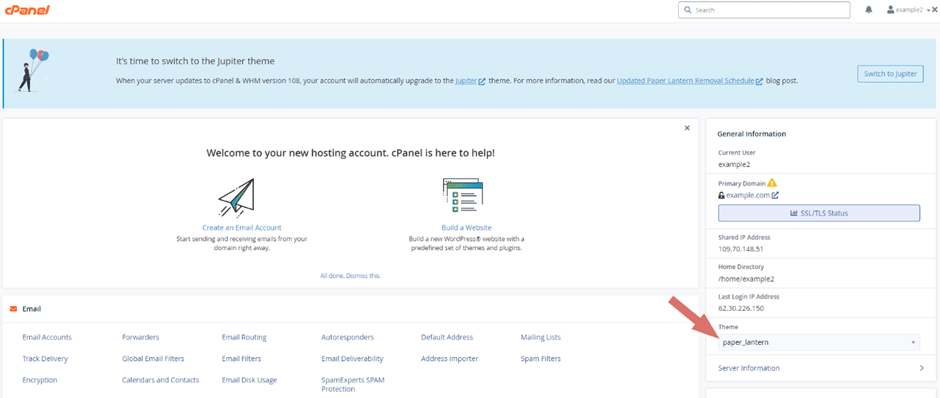
Switching to ‘Paper_Lantern’
This is how the ‘Paper_lantern’ cPanel theme looks like. You can switch back to Jupiter the same way, by clicking on the dropdown menu in the ‘Theme’ section and selecting the theme you desire.
Adding a New User
The good thing about cPanel is that you can have multiple users on your account. This is crucial when you want someone to help you manage your websites or simply giving them access for a required service.
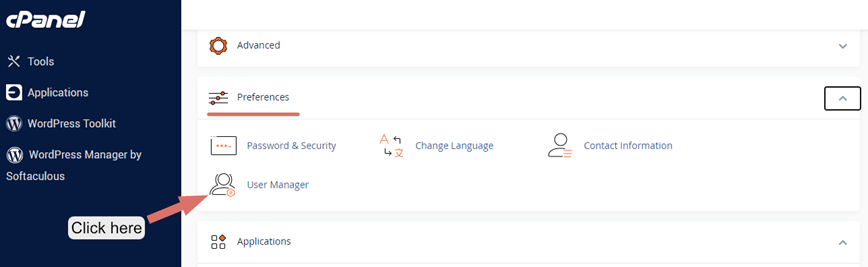
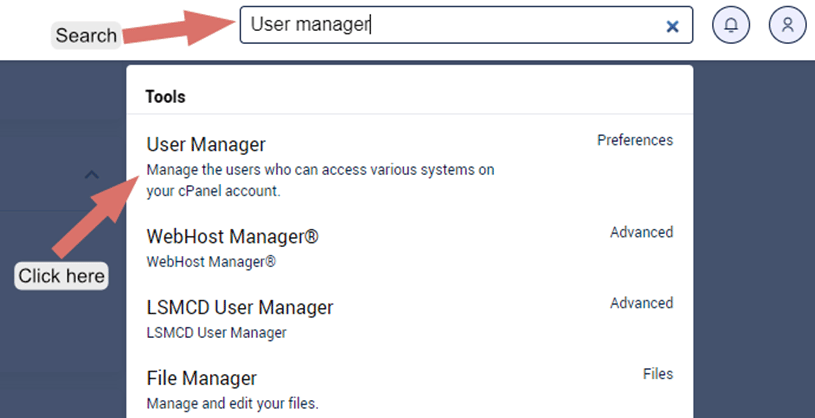
You first need to locate the ‘Preferences’ section in your dashboard. Once located click on ‘User Manager’
Or you can simply just search ‘User Manager’ using the search field on the navigation bar.
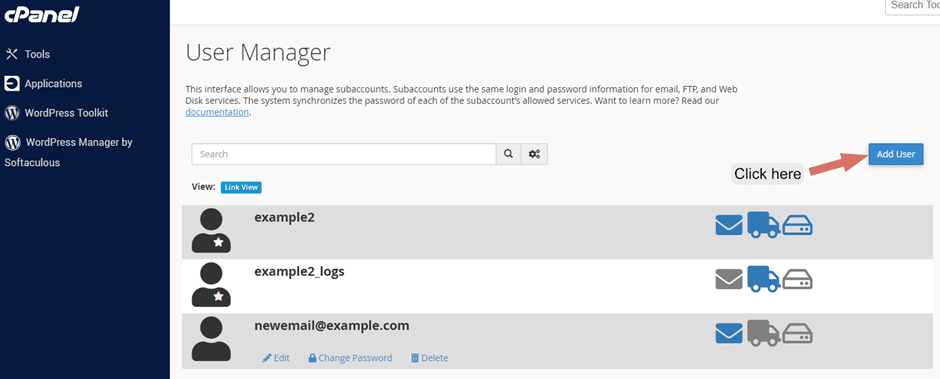
When in the ‘User Manager’ page, you will see a list of all the users on your cPanel account. To add a new user, click on the ‘Add User’ button.
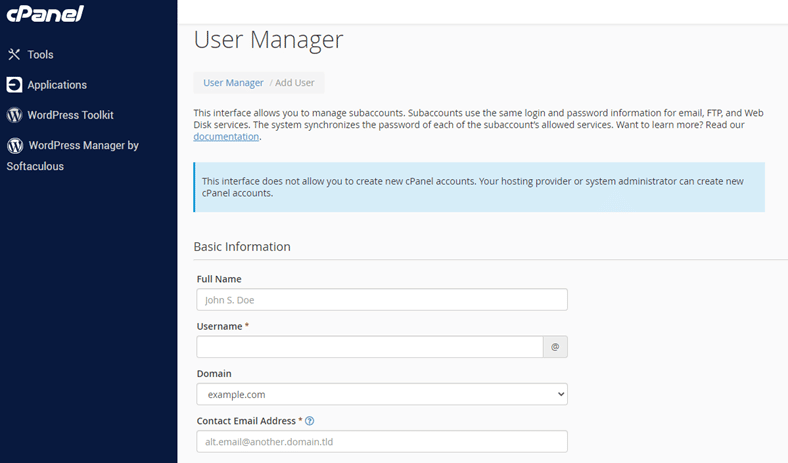
You should now fill in the ‘Basic Information’ details including; Full name, Username, Domain & Email.
In the ‘Security Information’ section, you must decide whether you want to set the password for the user or have an email sent out to them with the instructions on how they can set their own password.
The ‘Services’ section requires configuration of Emails, FTP and Web disk. For Emails, you can enable or disable email account for the user, with the ability to limit their quota. FTP can be enable and disabled for the user to allow or deny them file access via FTP, you can also limit the quota. For the Web Disk, we strongly emphasis that permissions should be reserved for your top-level admin accounts only. “Read-Write” level access gives the user full permissions to do pretty much whatever they wish within the specified directory (including deleting & uploading files)! “Read-Only” only permits reading, downloading, and listing files (which we recommend).
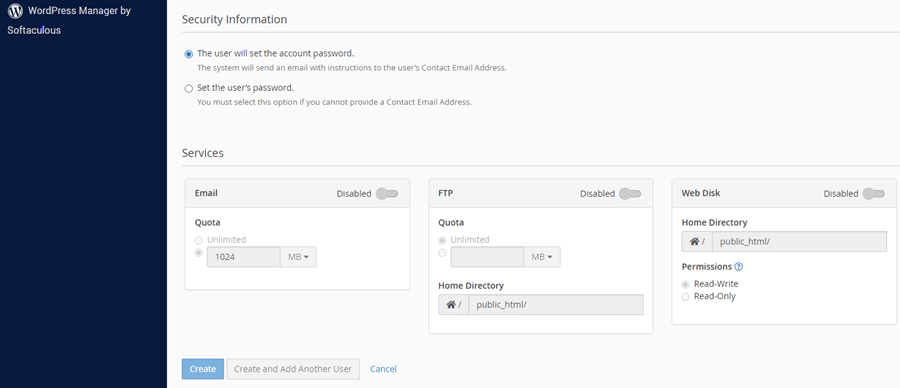
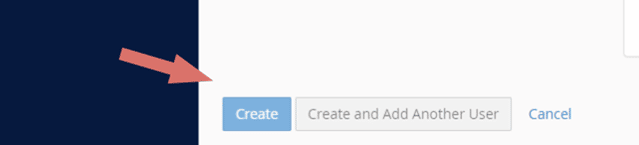
When you have finished setting the values you can proceed on clicking either ‘Create’ or ‘Create and Add Another User’
Additional User Manager Features
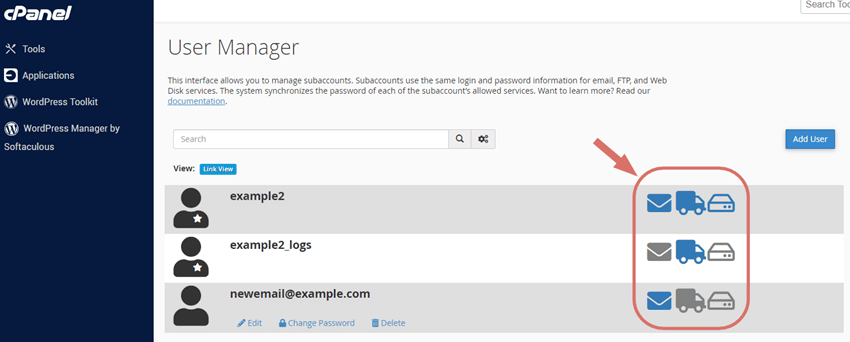
There are three icons next to each account (shown in the screenshot above):
- The envelope icon indicates if the person has an email account set up in the system – if the icon is blue that means there is an email account set up; if it’s grey, then there’s none
- The truck icon indicates if the person has an FTP account – again, blue for yes, and grey no
- The disk icon indicates if the user can use the web disk services on cPanel
Email Accounts
How to create an Email Account
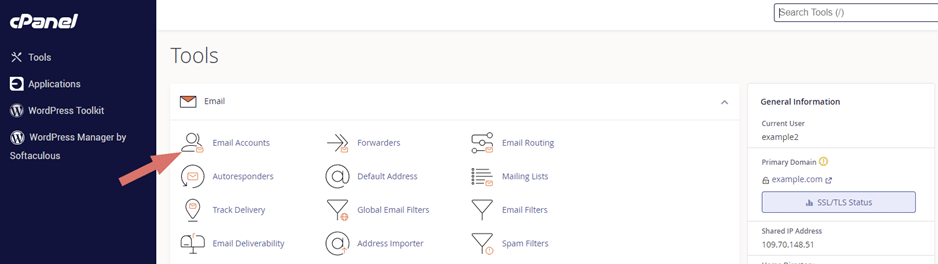
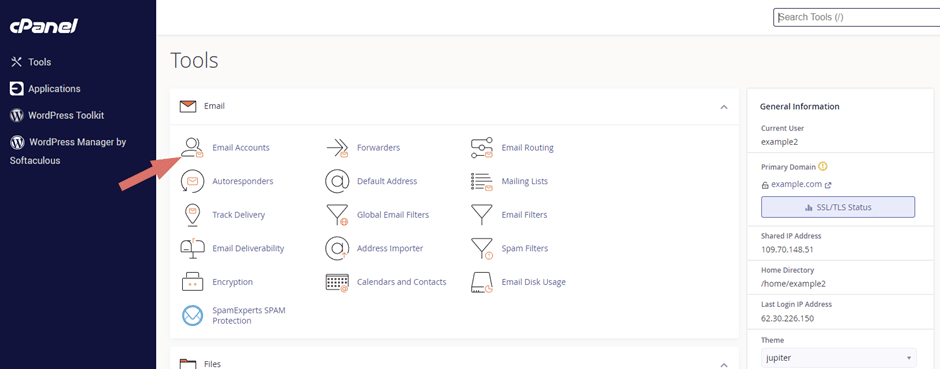
- Once logged in to your cPanel account, go to the ‘Email Accounts’ section
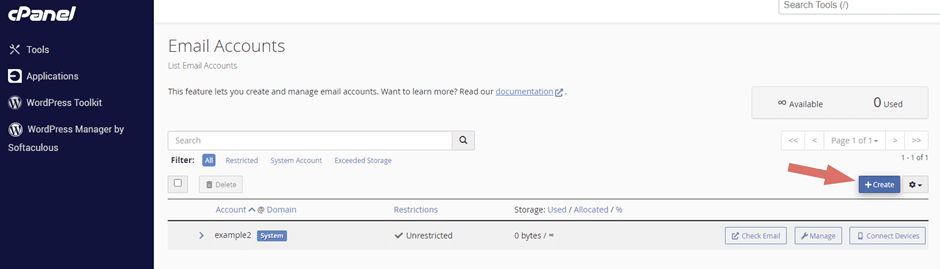
- In the ‘Email Accounts’ page, you need to locate and click on the create button for a new email account.
- In the ‘Create an Email’ section, you need to choose username (username@yourdomain.com) and a suitable password. We recommend that you generate your password to helps prevent your account being compromised.
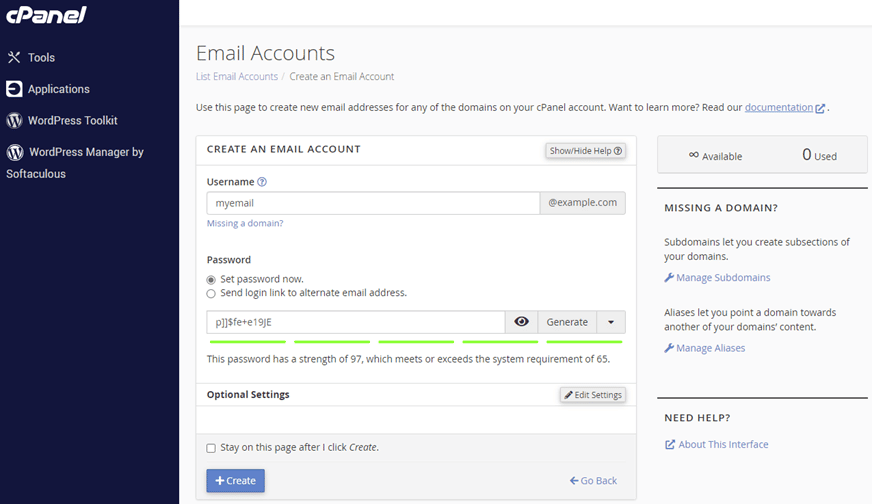
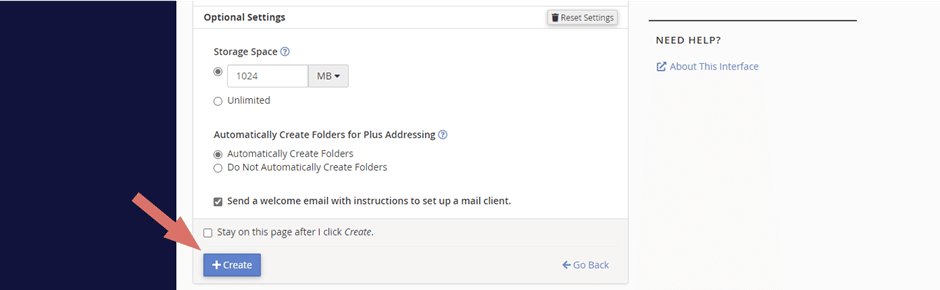
- You have the ‘Optional settings’, this allows you to allocate disk space for the email account. Please note that this step is optional. You can now click on the ‘Create’ button to create the email account.
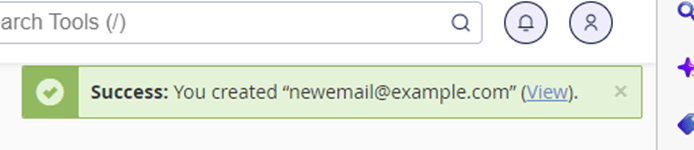
- After creating the account, you should see this pop-up message on the top right side on the interface. Letting you know the process has been successful, you email have been created.
- This is how your email account will be listed after creation. Congratulations, you now know how to create an email in cPanel.

How to access Webmail
Direct access
Webmail can be access directly or through the cPanel interface. To access webmail directly, you should use port 2096 after the IP address or domain. For example, https://yourdomain.com/2096, the common way of accessing your webmail is https://yourdomain.com/webmail.
Email Access through cPanel
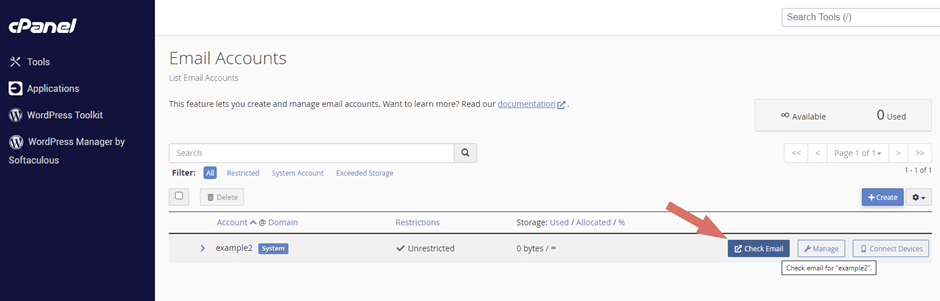
- Once in your cPanel you need to look and click on ‘Email Accounts’
- Once in the ‘Email Accounts’ page, look for the email account you want to view emails and click on the ‘Check Email’ button.
Now that you are successful logged in to ‘Webmail’ you can view your emails using ‘Roundcube’ by clicking ‘Open’. You can even change webmail client to either ‘Afterlogic’ and ‘Horde’.
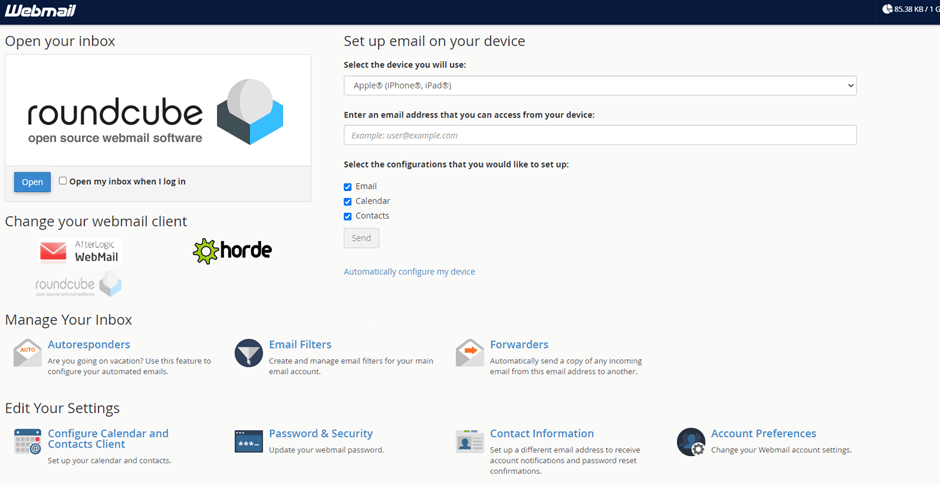
After clicking ‘Open’ you’ve successfully accessed your email.
Domains
Managing Domain Names
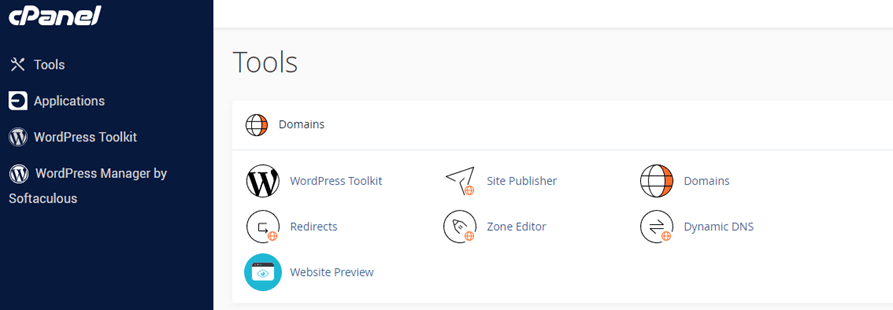
This is the domain section of cPanel. You can add domains and manage your existing domains, as well as set up subdomains.
Adding a New Domain
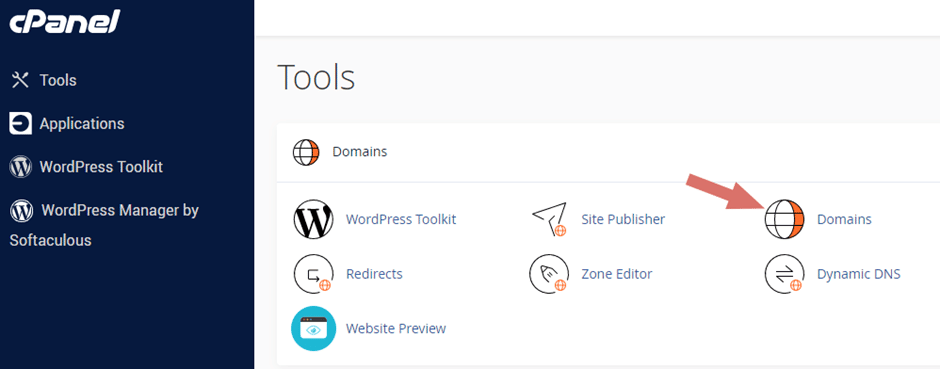
To add a new domain, click on ‘Domains’ in the ‘Tools’ section under the ‘Domains’ tab.
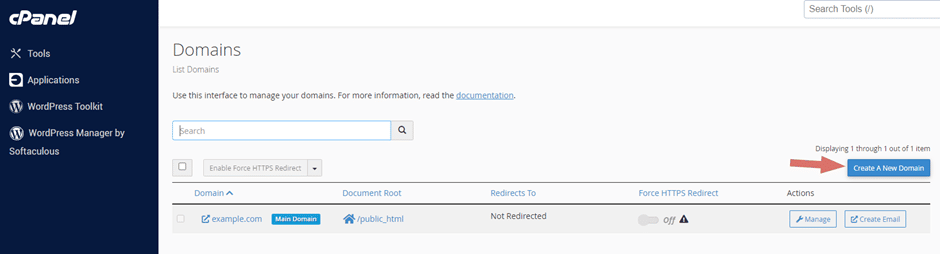
Now in the ‘Domains’ page, you should click on the ‘Create A New Domain’ button.
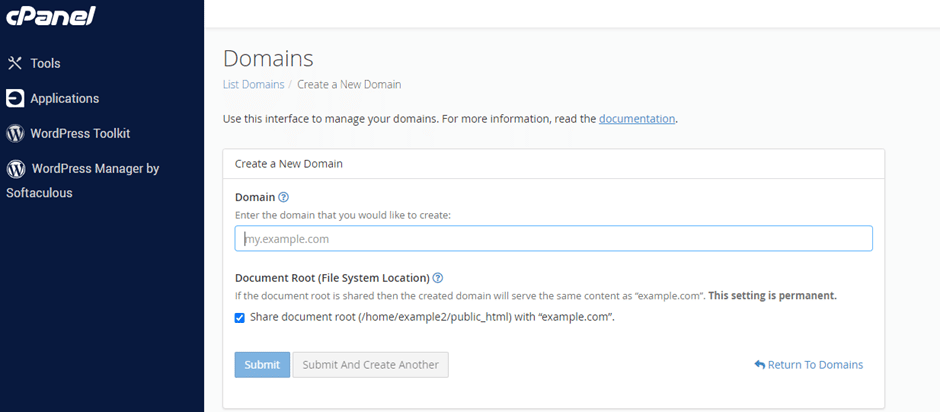
In the ‘Create A New Domain’ section, you can now enter your new domain. After you’ve entered your domain, you can either click on ‘Submit’, to finish the process or choose ‘Submit and Create Another’ meaning the domain has been created for you, but you want to repeat the process with another domain after completion
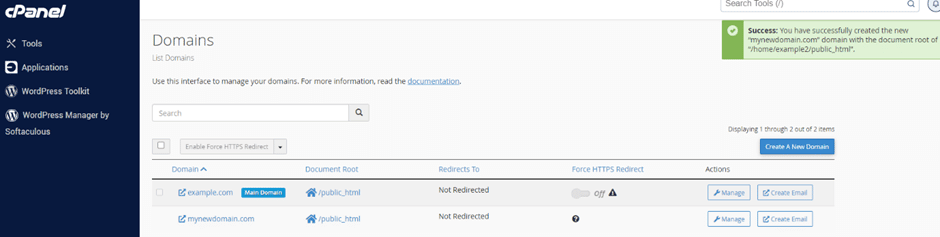
After clicking on submit, you should get a ‘Success’ message like the one shown below. This means that you have successfully created your new domain.

You should now see the domain you added on your list of domains.
How to delete a Domain?
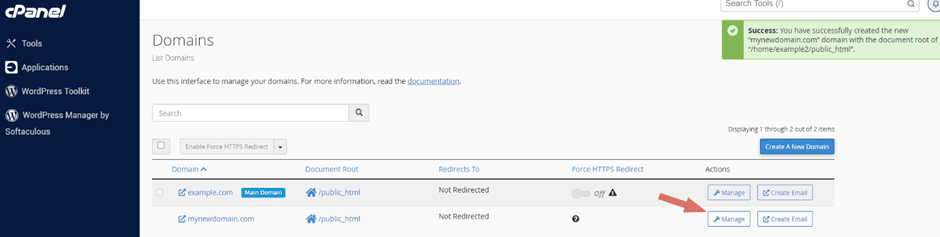
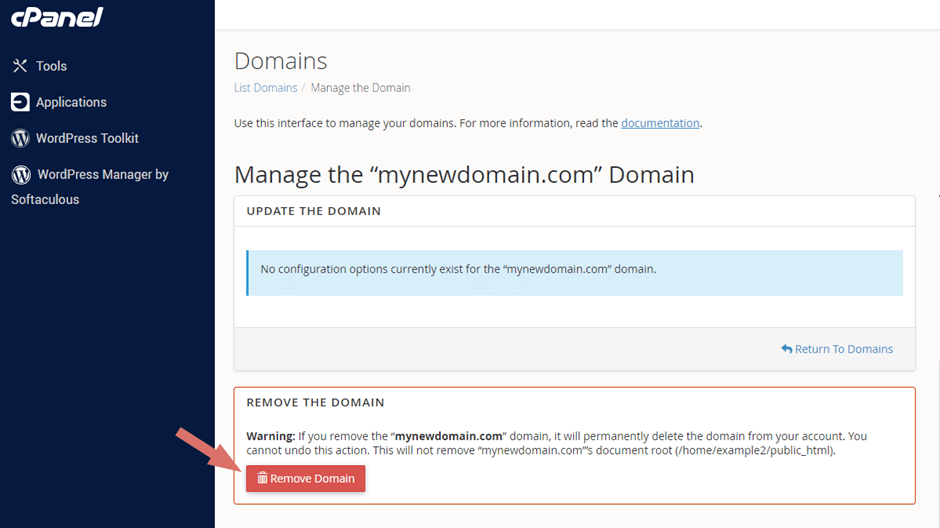
To delete a Domain, you would need to click on ‘Manage’ on the domain you want to delete.
When in the ‘Manage’ section, to delete the domain click on ‘Remove Domain’.
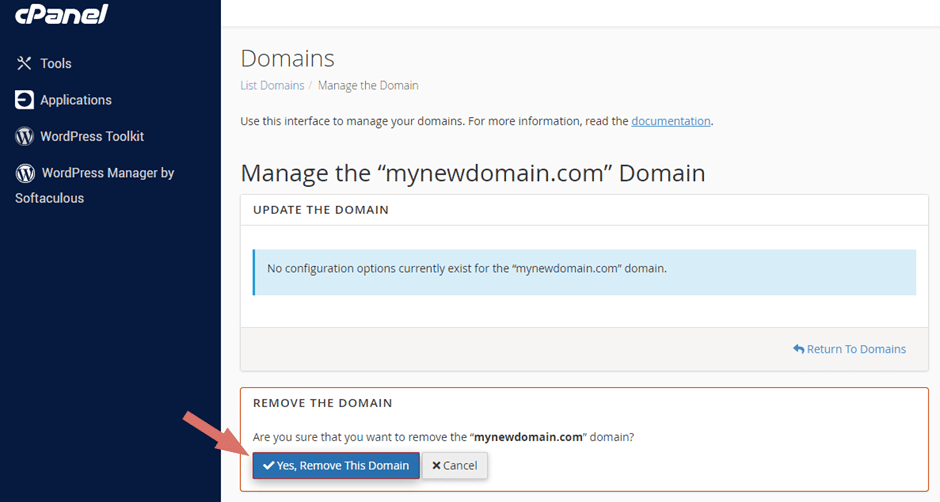
After clicking on ‘Remove Domain’, you need to confirm that you want to delete the domain by clicking on ‘Yes, Remove This Domain’
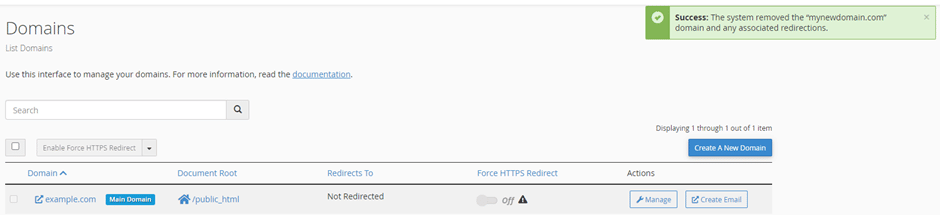
The picture below shows a ‘Success’ message, which means you have now successfully deleted the domain.

The domain has now been removed from your list of domains.
Congratulations! You now know how to add and delete a domain.
Managing Your Files
File Manager
You can manage your files via cPanel ‘File Manager’ or by using an ‘FTP client’.
The cPanel File Manager is a tool that enables you to manage your files directly within cPanel without having to use an FTP client.
How to access File Manager
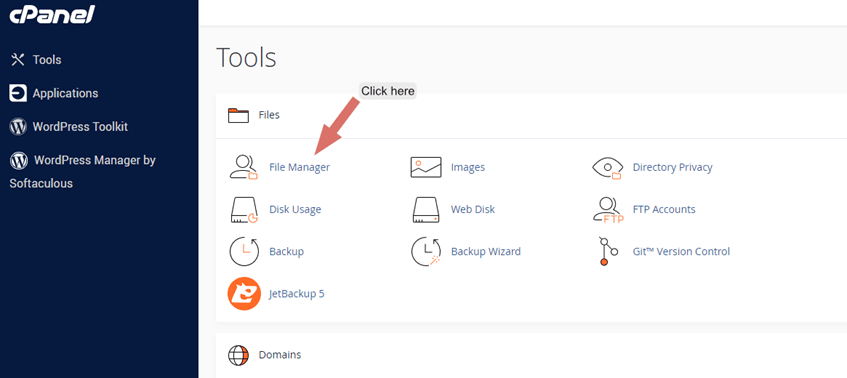
From your cPanel dashboard, in the ‘Tools’ section, locate ‘Files’. Find and click on ‘File Manager’.
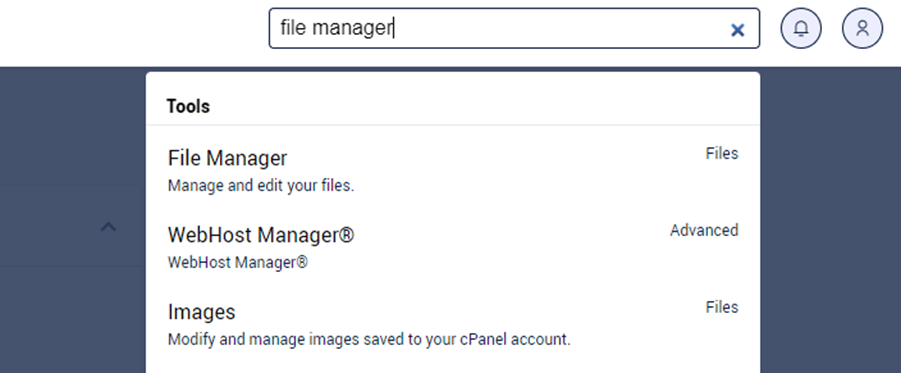
Another way to find the ‘File Manager’ is by using the search field on the navigation bar. Simply type in what you’re looking for, in this case ‘file manager’.
After clicking on ‘File Manager’, you should see the contents in the pictured below.
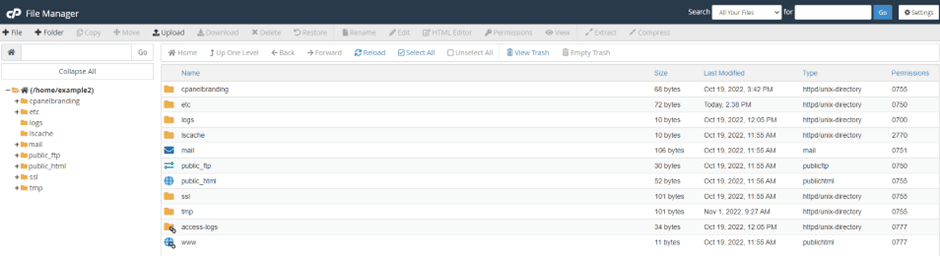
With ‘File Manager’ you can create files, folders. Upload files and folders. Download files and folders. Delete files and folders. Rename file and folders. Edit, Restore and set permissions using the top bar. Shown below:

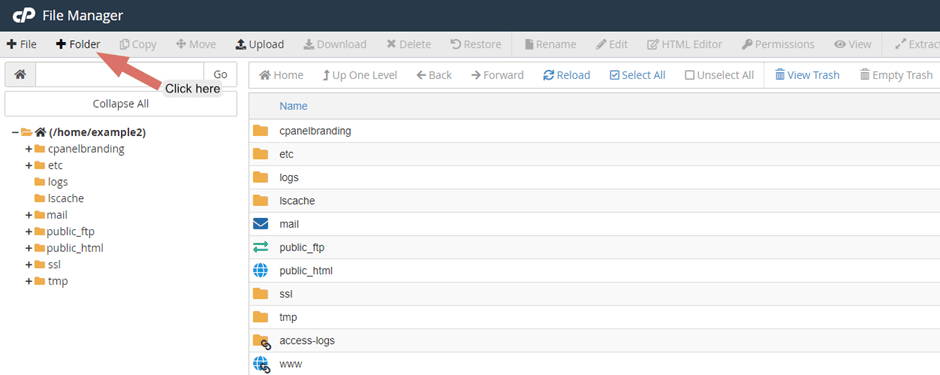
How to create a folder
Creating a folder in ‘File Manager’ is simple and easy. All you need to do is click on the ‘+Folder’ button.
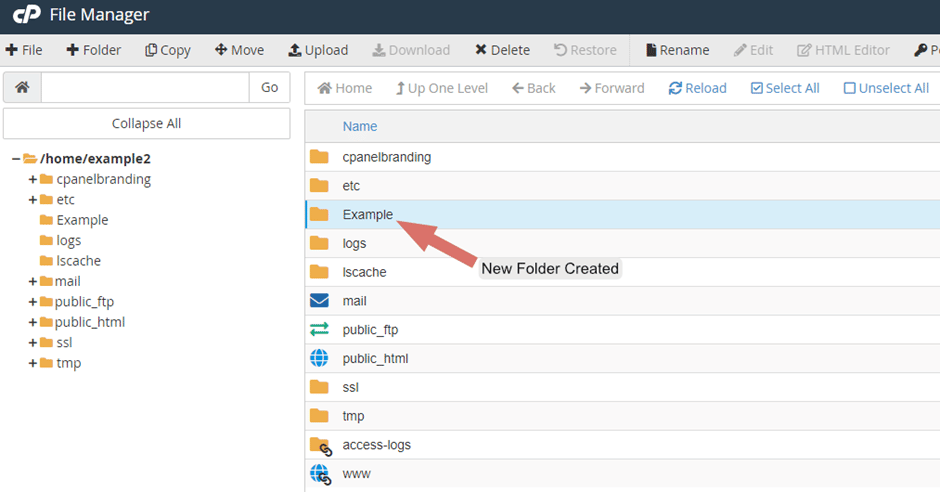
You will get a pop up asking you for the new folder name and the root folder you want the new folder created in. Fill those details in and click on ‘Create New Folder’.
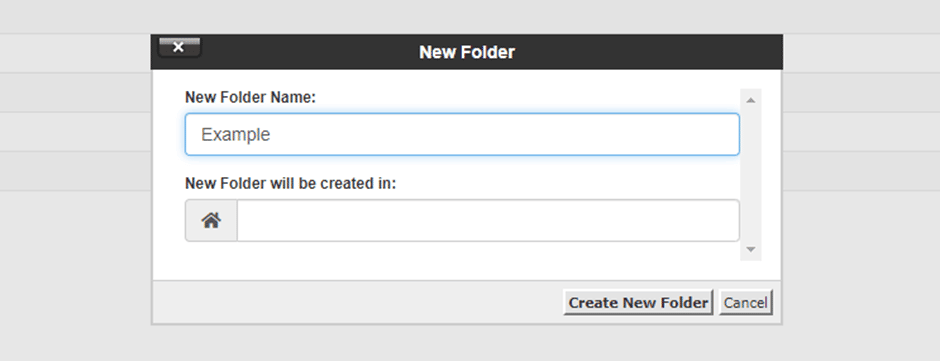
Now you can see the folder that you have created!
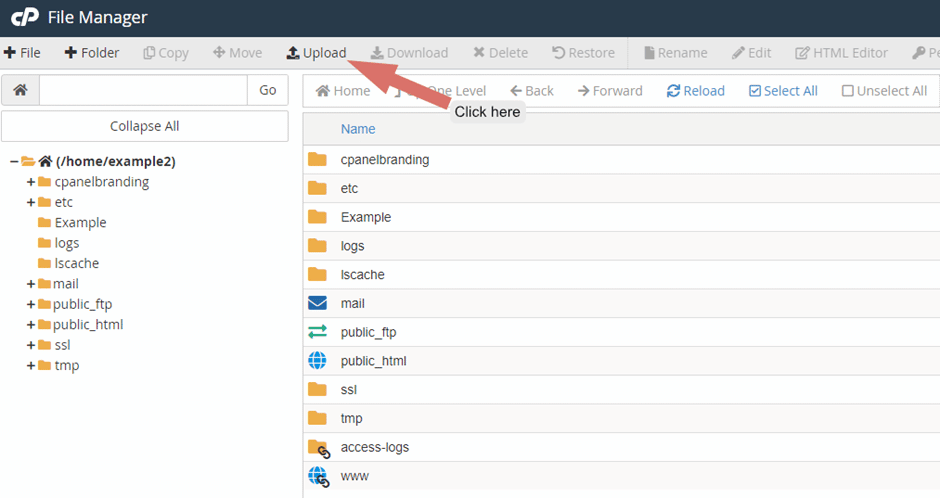
How to upload a file
You can easily upload files in File Manager. On the top navigation bar, find and click on ‘Upload’.
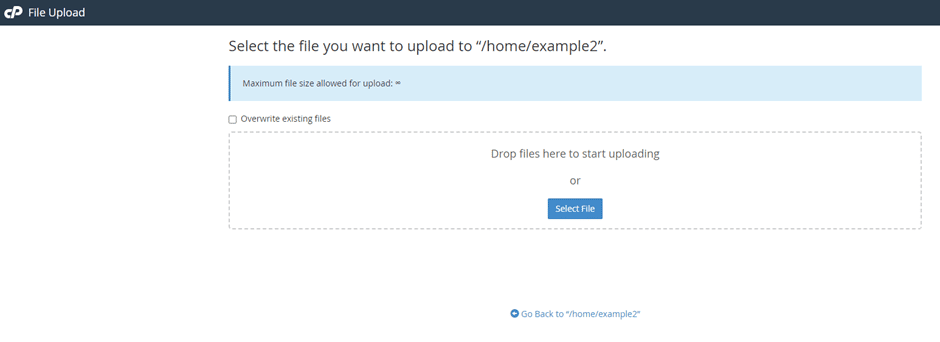
When in ‘File Upload’ you can either drag and drop your files or click on ‘Select File’ and your local file explorer should pop up. As you can see, At Brixly you get an unlimited file size upload.
Using cPanel’s FTP
What is an FTP?
FTP stands for File transfer protocol, it is a way to download, upload, and transfer files from one location to another on the Internet and between computer systems. FTP connection needs two parties to establish and communicate on the network.
How to access my FTP
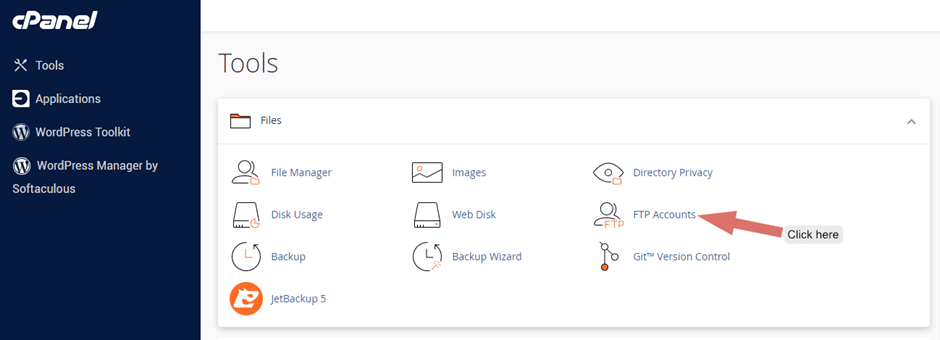
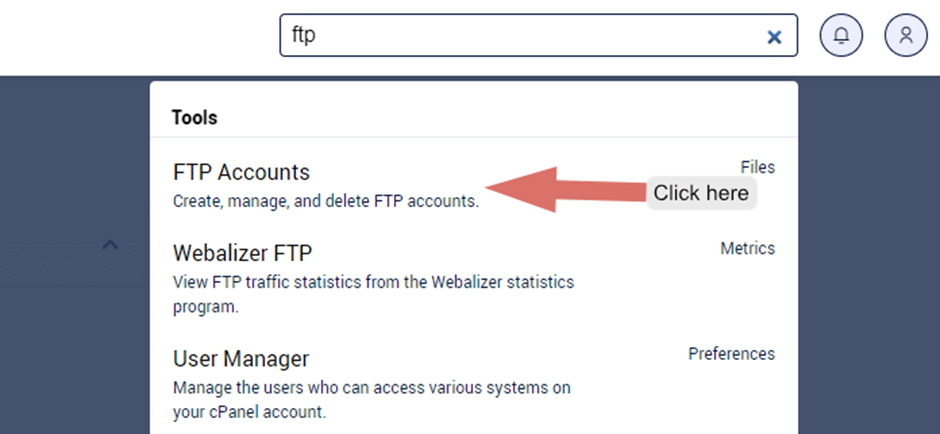
To access your FTP you need to navigate to your main cPanel ‘Tools’ section. Now find the ‘Files’ tab and click on ‘FTP Accounts’.
Solution 2
You can simply just search ‘FTP’ in the search field on the navigation bar and click on ‘FTP Accounts’.
How to create new FTP Accounts
To create new FTP accounts, click on ‘FTP Accounts’ in the ‘Files’ section. You’ll see this screen:
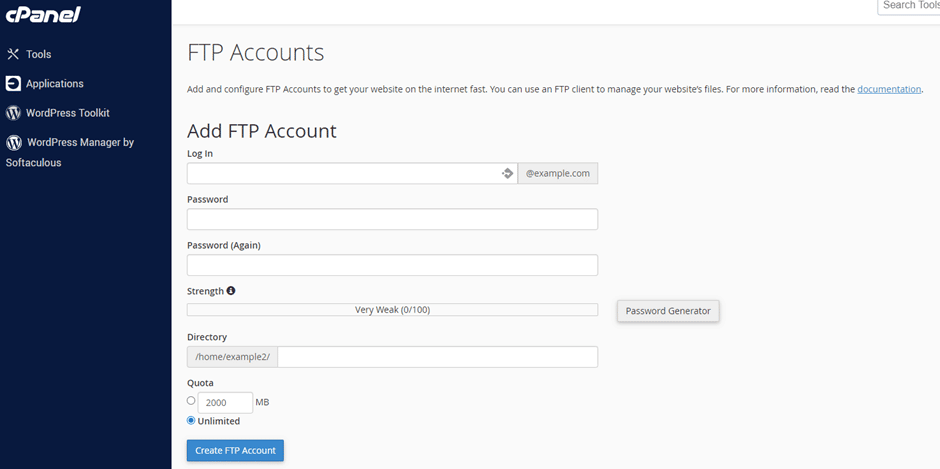
Fill in the details under the ‘Add FTP Account’ section.
Log In – Type in the username of the new account.
Password – You can set it to any value you want, but we recommend you use the ‘Password Generator’
Directory – This defines the new FTP account’s highest level of directory access. If you leave this blank, the user will have access to the root. It’s best to input the directory associated with the project that the account is for.
Quota – The maximum space that the new user can take up. Best leave at ‘Unlimited’.
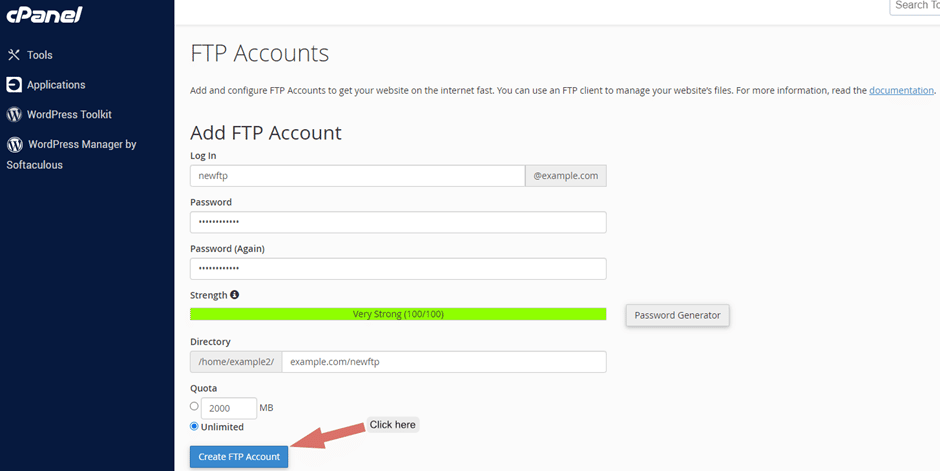
Once you’ve finished filling in the details, click on ‘Create FTP Account’, the new user will be added.
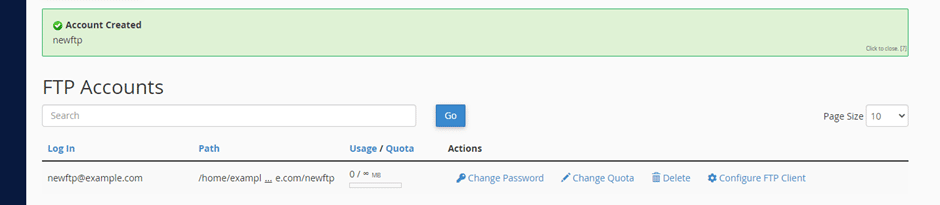
Your FTP account has been successfully created!
Databases
Database are used to help you manage your online data. It allows you to keep and handle large amounts of data even if you’re not a very technical person.
Creating a database
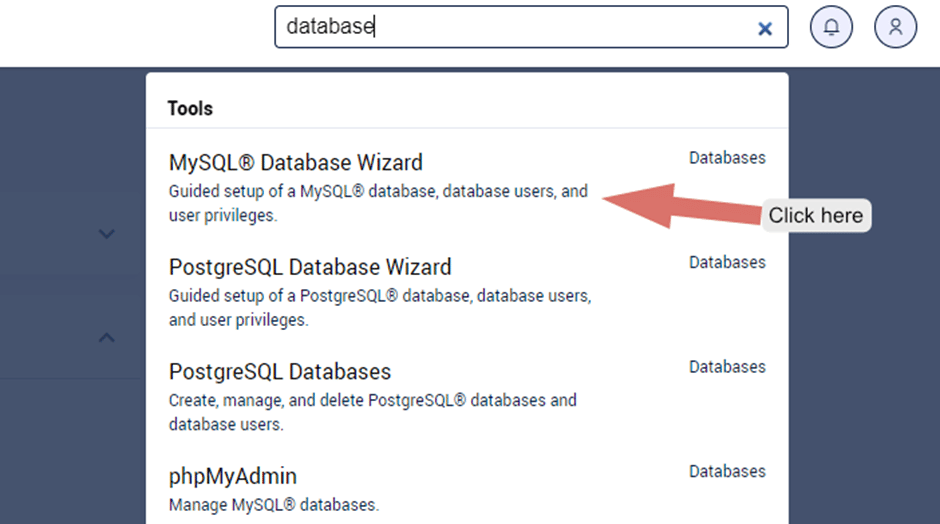
There are a few ways databases can be created, in this instance we are going to be exploring the ‘MySQL Database Wizard’.
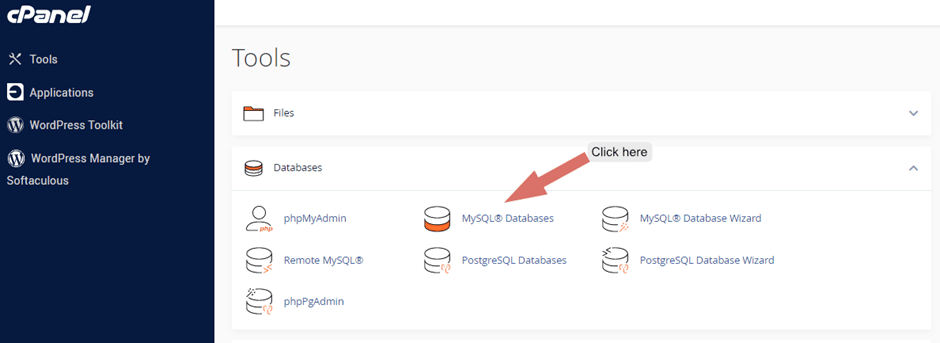
First you would need to be in the cPanel ‘Tools’ section. Look for the ‘Databases’ tab and click on it.

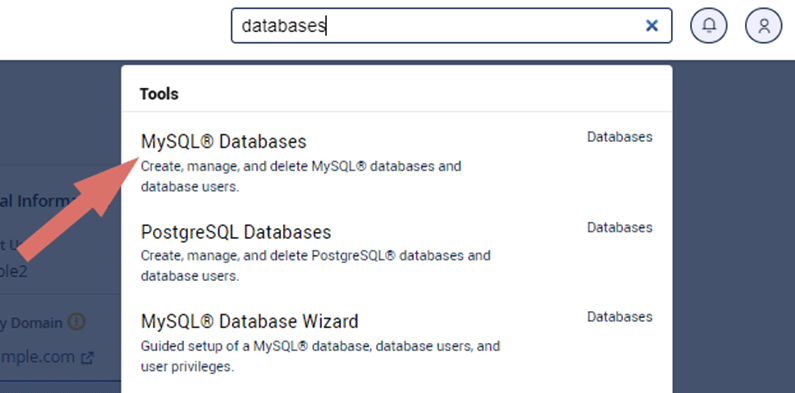
Another way to find ‘MySQL Database Wizard’, is by simply searching ‘database’ in the search field on the navigation bar.
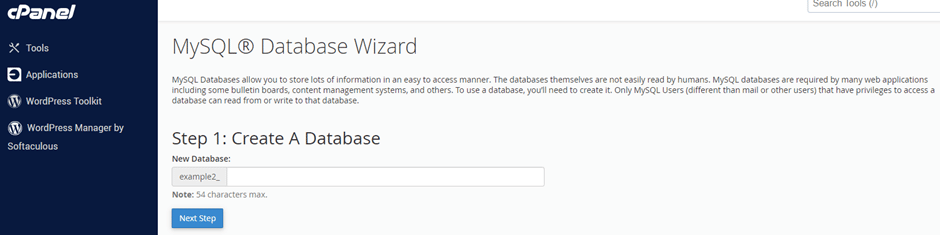
Step 1 – The first step in the database wizard is to give your new database a name and click ‘Next Step’.
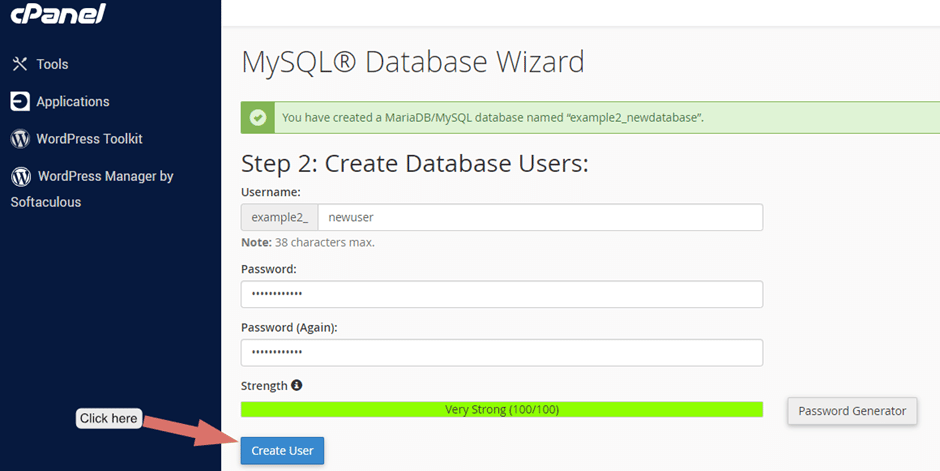
Step 2 – You must create a user that can access the database. Add a username and password, we recommend using the ‘Password Generator’.
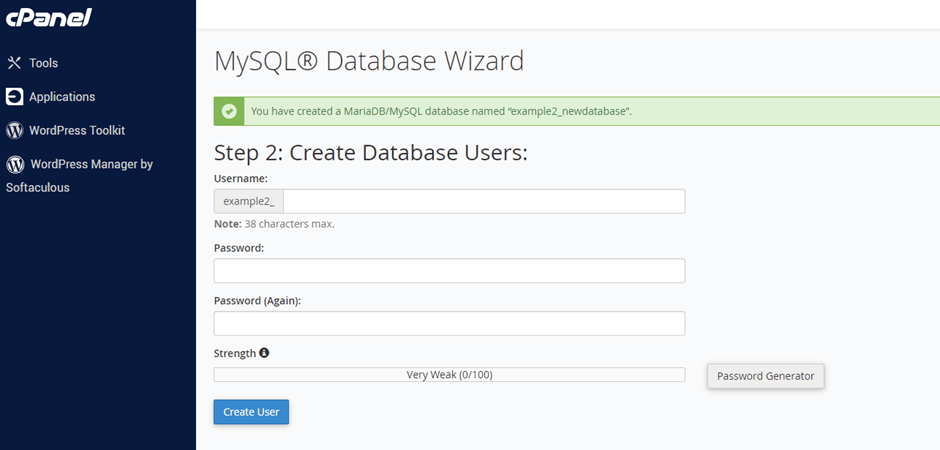
After that click on ‘Create User’.
Your new user has been created!

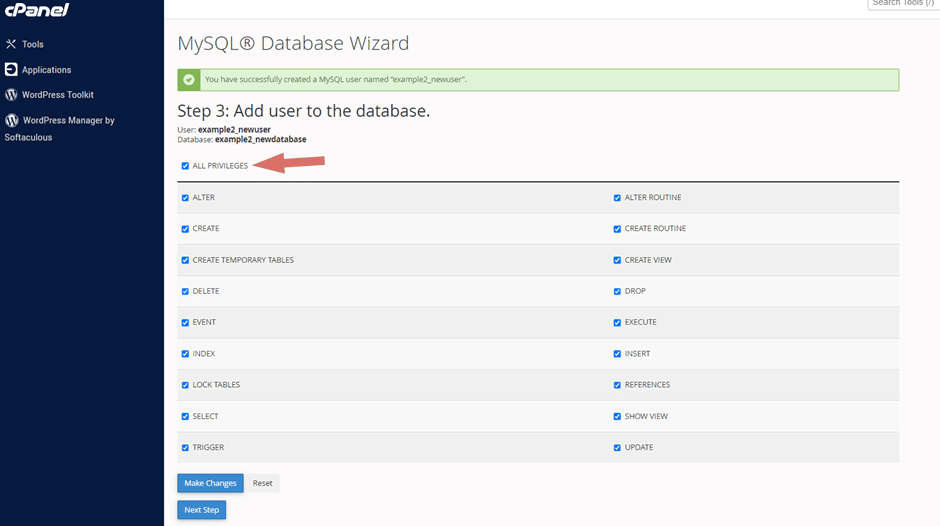
Step 3 – After creating a user you now need to assign that user privileges with database privileges. We recommend selecting all privileges. Click on ‘Make Changes’ when you’re done.
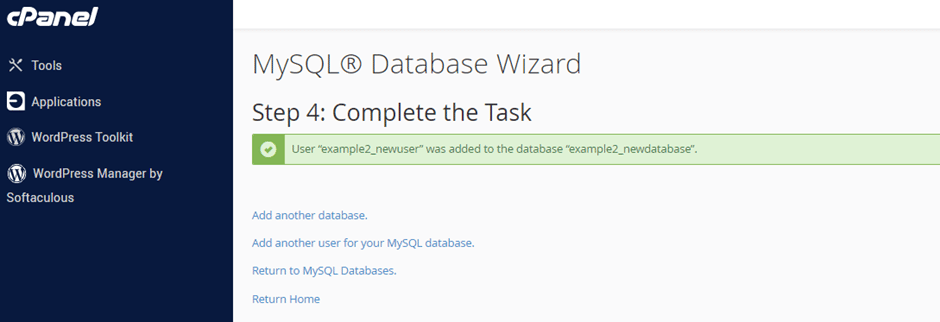
Step 4 – Done! You have now completed creating a database.
Managing Your Databases
To manage all your databases you need to located ‘MySQL Databases’ in the ‘Tools’ section on cPanel, under the ‘Databases’ tab.
The easiest way to find ‘MySQL Databases’ is to search ‘databases’ in the search field on the navigation bar.
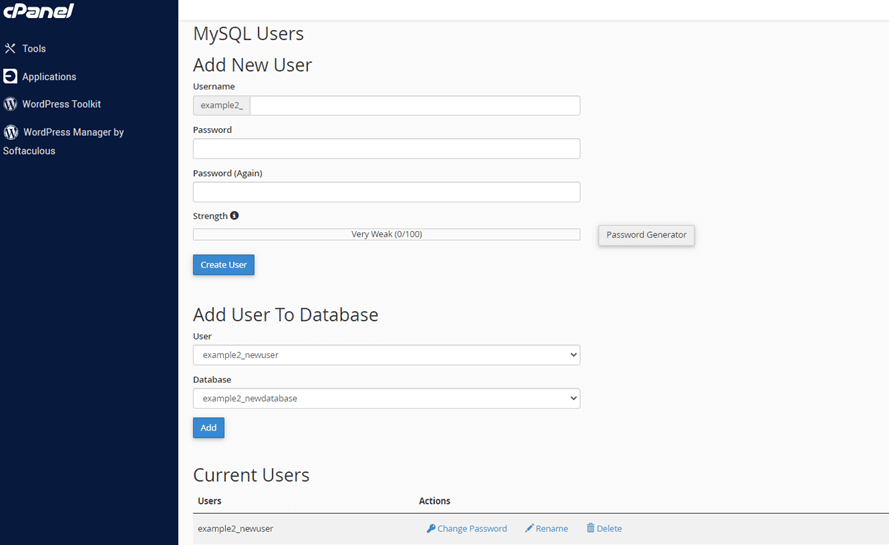
In the ‘MySQL Databases’ page you can check, repair, create, rename or delete your database.

When the scrolling down on the ‘MySQL Databases’ page, there are other options such as, adding a new user, adding users to databases, changing user password, renaming, and deleting users.
Backing Up Your Website
Hopefully you already who know how important it is to keep a backup (if not, right now is a good time to start). A backup is the main guarantee that your site can be completely restored after any problems and crashes. Too many website owners have learned the hard way how important it is to create regular backups.
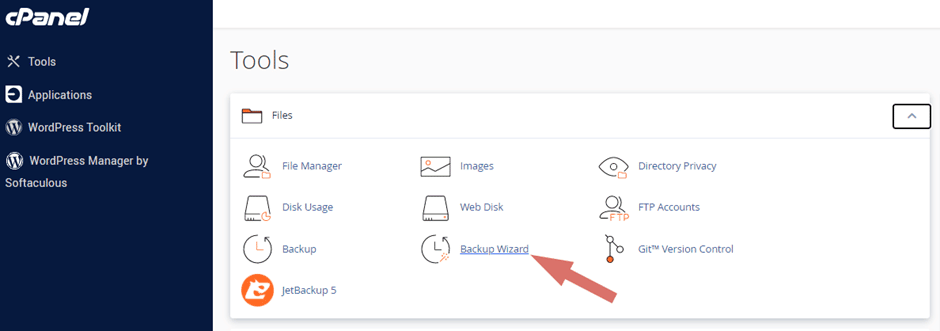
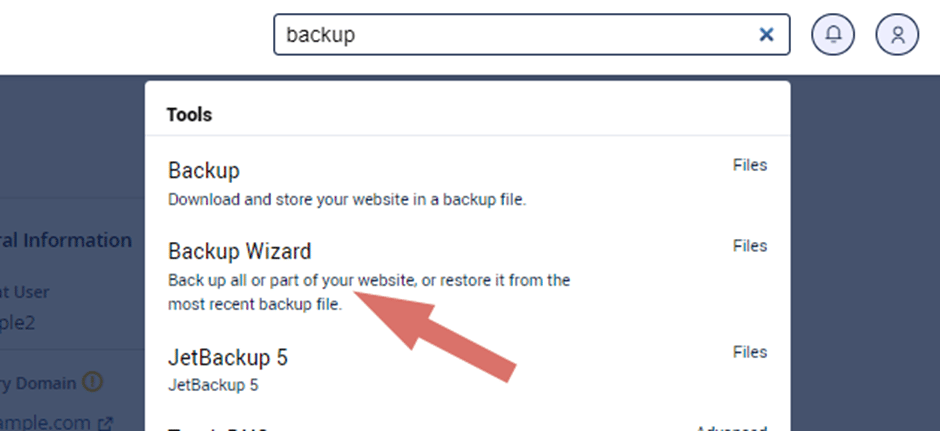
The easiest way to find ‘Backup Wizard’ is to search ‘databases’ in the search field on the navigation bar.
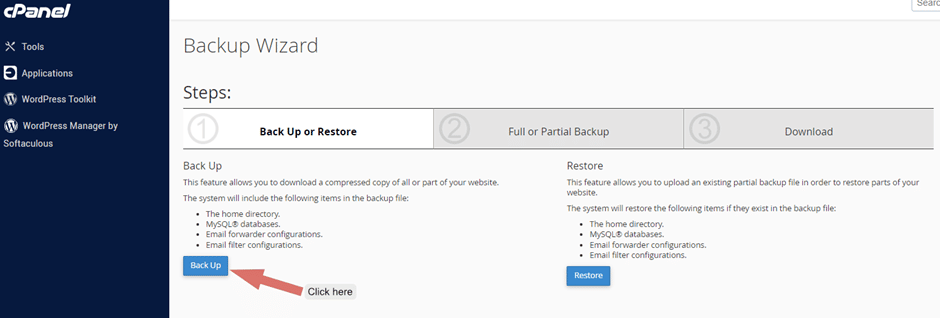
When on the ‘Backup Wizard’ Page click on the ‘Back Up’ button.
The system will include the following items in the backup file:
- The home directory.
- MySQL® databases.
- Email forwarder configurations.
- Email filter configurations.
Now choose the type of Backup you require. We recommend a full backup, click on the ‘Full Backup’ button to start.
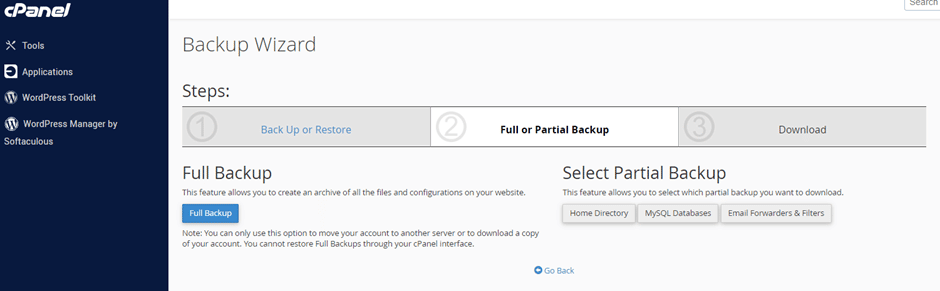
Choose your Backup Destination, in this case we will be downloading the Backup to our ‘Home directory’.

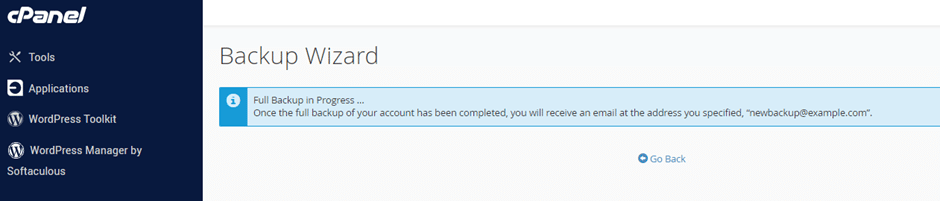
Backup has been generated! The time it takes to complete depends on the size of your website. You will get an email once the process is completed.
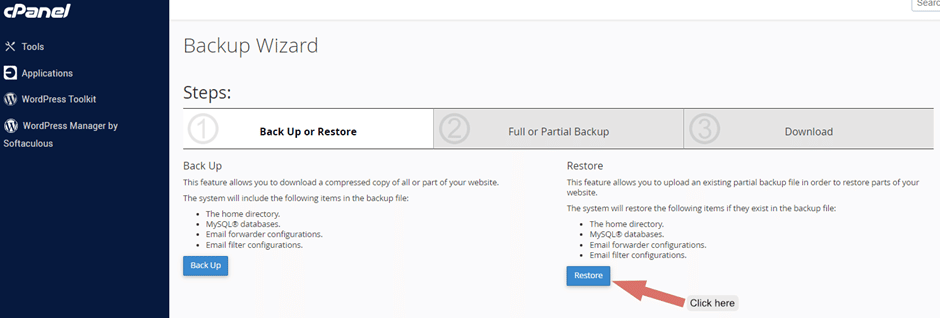
How to Restore my Backup
To restore a backup, go to ‘Backup Wizard’ and click on ‘Restore’.
Please note: You cannot restore full backups through your cPanel interface.
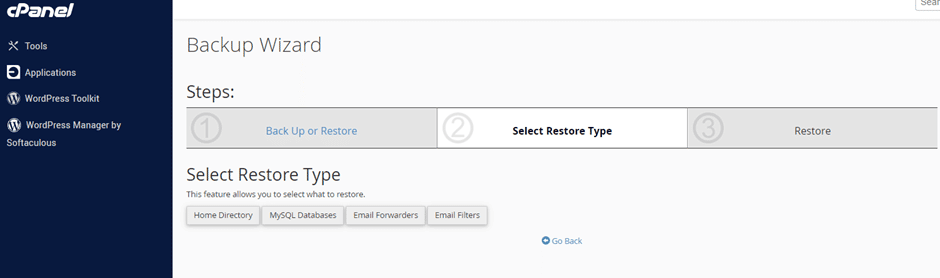
In this case we will be using the ‘Home Directory’ to restore our backup.
Final step: Choose the backup file and upload it!
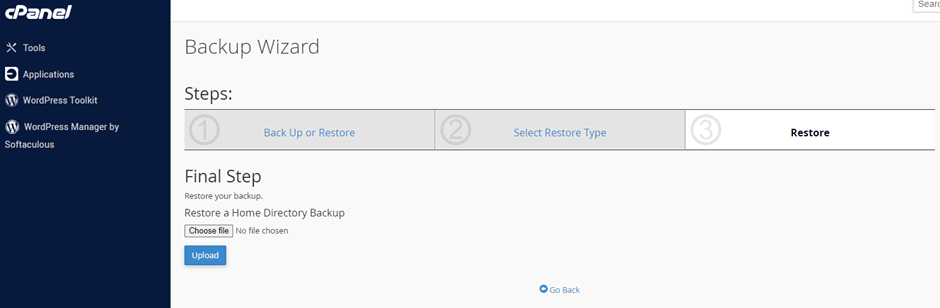
Congratulations, Backup Restored!
Additional Information
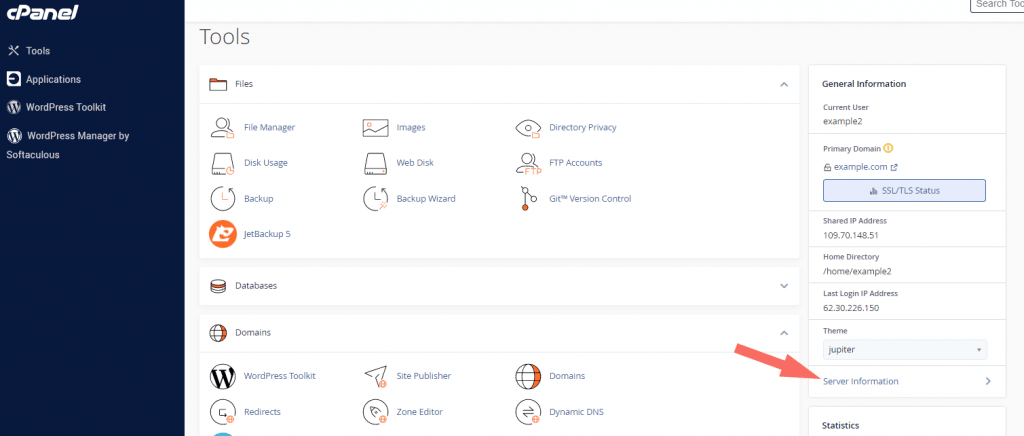
Server Information
You can access your server information from your cPanel dashboard. In the jupiter theme look at the sidebar on the right and click on ‘Server Information’
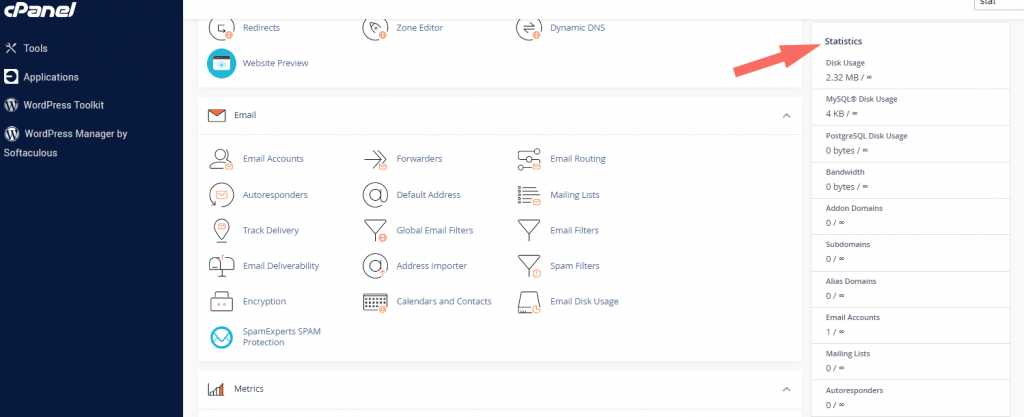
Checking your disk space
Depending on your hosting provider and the hosting plan you have, it is crucial to check your disk space as this help identify how it’s being used and where excess space is being used.
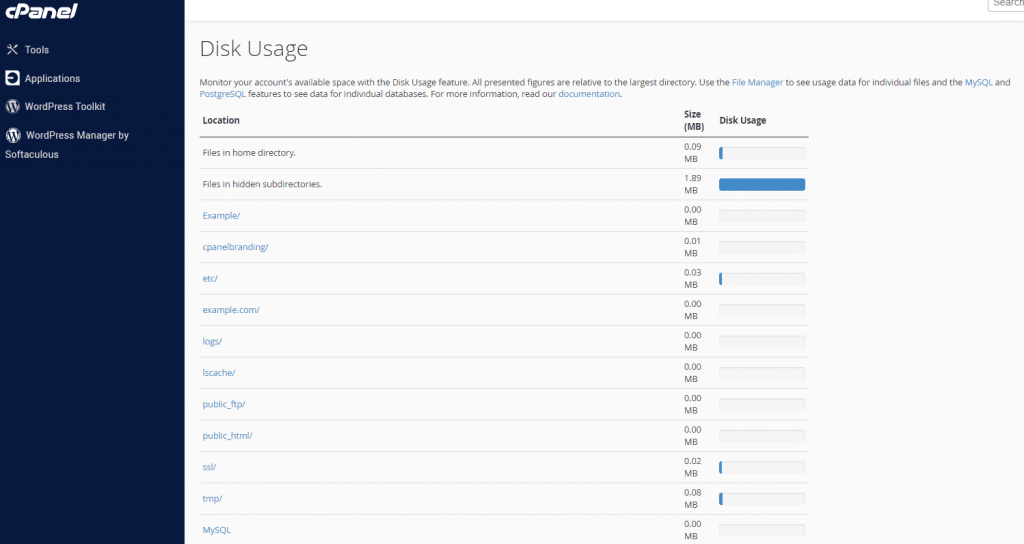
Disk Usage
To check your ‘Disk Usage’ you need to located ‘Disk Usage’ in the ‘Tools’ section on cPanel, under the ‘Files’ tab.
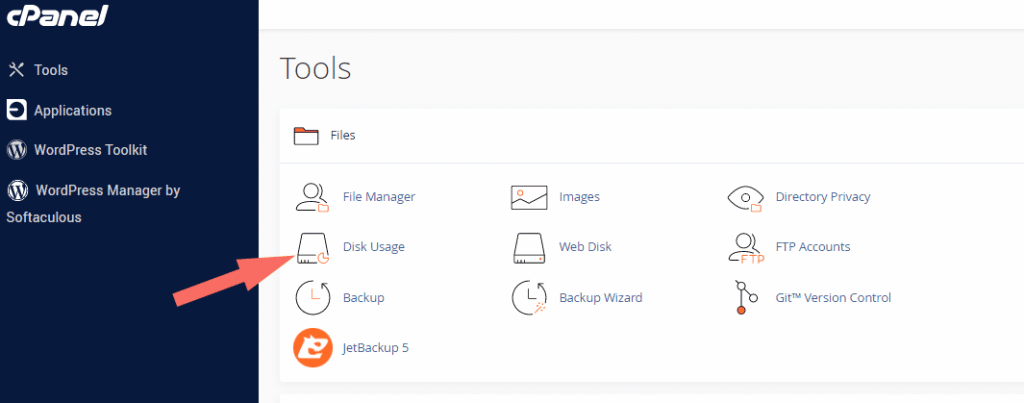
You can use the ‘Disk Usage‘ page to monitor your accounts available space.
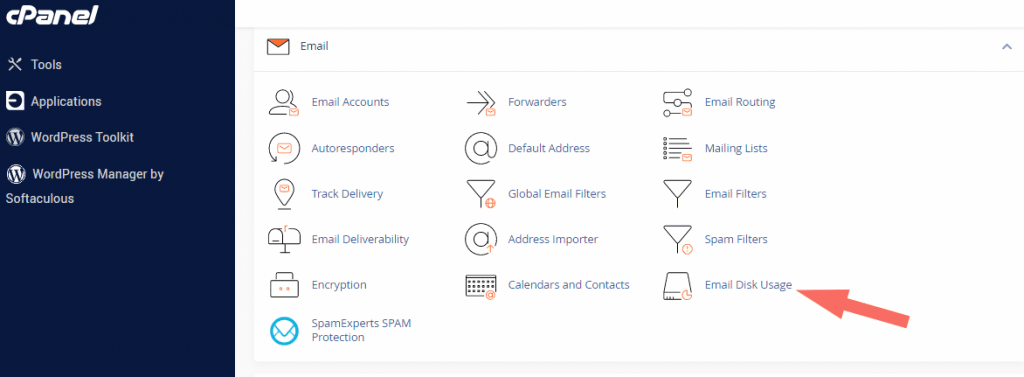
Email Disk Usage
The email disk space page allows you to easily manage the disk space usage of your email accounts. This is one of the most popular support ticket reasons from clients whose mailbox is full. Well this tool allows our clients to easily manage and if need be, remove old messages from their mail account.
To access your Email Disk Usage you need to navigate to your main cPanel ‘Tools’ section. Now find the ‘Emails’ tab and then click on ‘Email Disk Usage’.
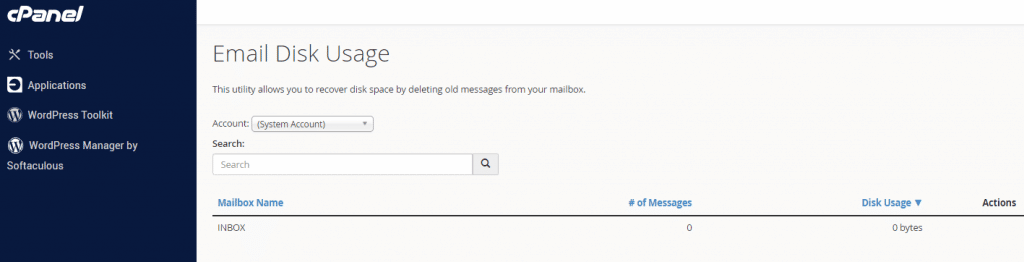
This is the ‘Email Disk Usage‘ page. Showing you the mailbox name, number of emails, disk space and what actions you can take on the mailbox.
Want to Install WordPress?
Why not check out our ‘HOW TO INSTALL WORDPRESS USING CPANEL‘ guide.